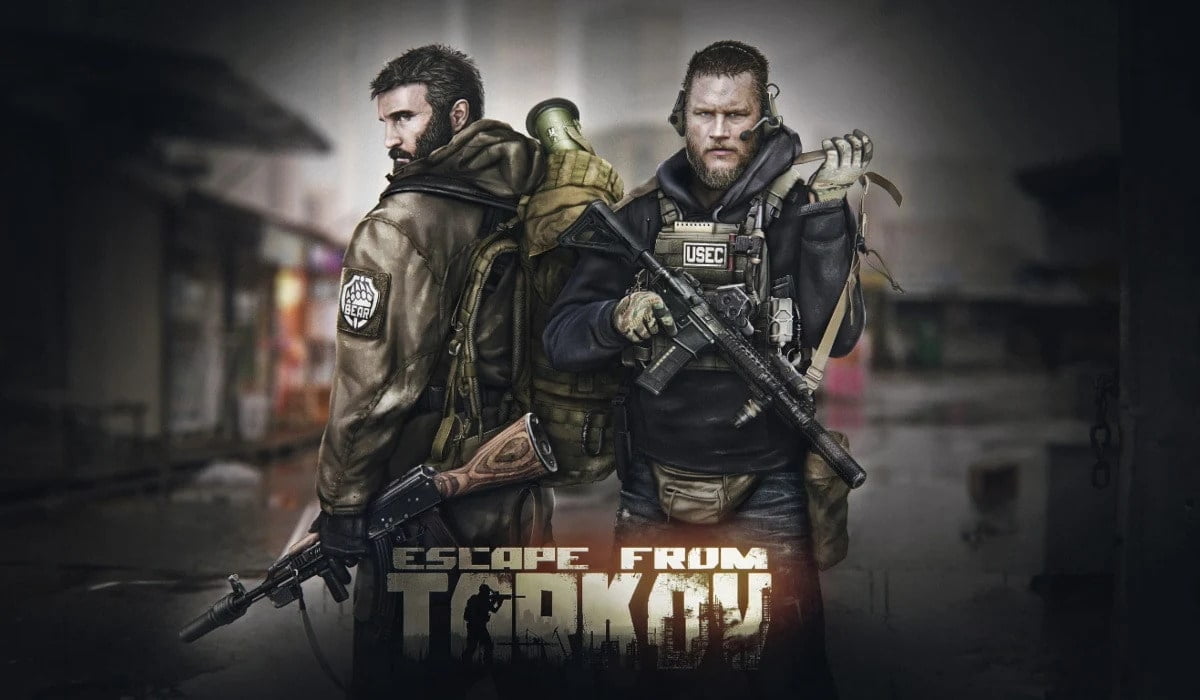
Lighthouse is the eighth map of Escape From Tarkov introduced in update 12.12. It is one of the wildest rides in Tarkov, so if you want to score some amazing loot or simply test your survival skills, you’re in the right place. Today, I’m breaking down everything you need to know about getting through this dangerous, loot-packed terrain alive. This Lighthouse map guide tells where to find spawns, extractions, exits, loot areas, and keys, as well as how to face the Rogues.
Lighthouse has been updated with patch notes that added the surrounding area and the lighthouse itself. Also, some areas of the sewer system that were previously inaccessible are now open to wonder. As a bonus you can now roam the rooftops which were once the hideout of the feared Rogue. There are 3 new bosses called “Goon Squad” you can find them in the Sewage Plant and the Chalet. This guide will tell you everything you need to know about the EFT Lighthouse map.
Escape From Tarkov Lighthouse Map Introduction
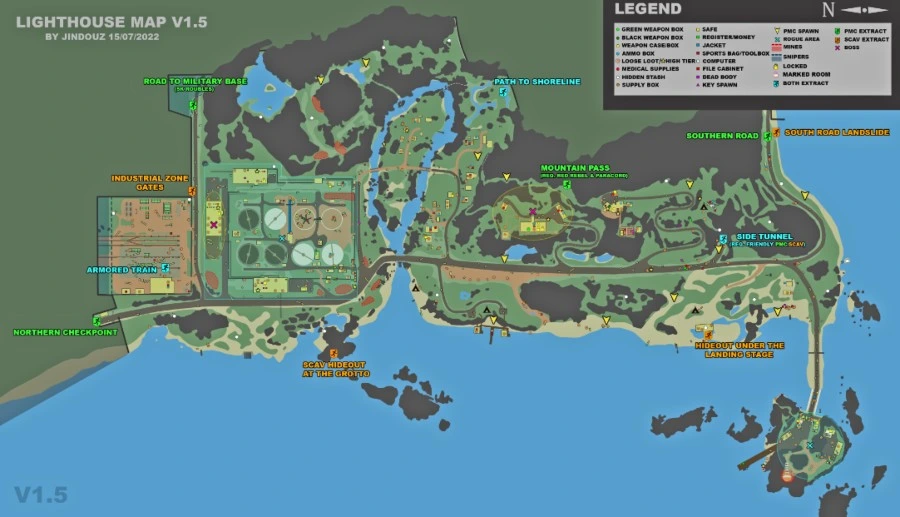
The Lighthouse map is huge, a mix of rugged outdoor spaces, scattered buildings, and the infamous Water Treatment Plant guarded by Rogues. It’s the only map where you encounter these tough Scavs. They have mounted machine guns, grenade launchers, and an attitude that says “Get out, or get wrecked.”
The map is unique in its layout, running mostly north-south so the direction is straightforward, with landmarks like the Train Yard in the north and the coastal Cottages to the south. But beware, while the scenery can be lovely, every inch of this place has potential death traps—from Rogues to landmines to hidden snipers, to that ominous bridge leading to the Lighthouse island.
Spawn Points and Early Game Strategy
The Lighthouse is not different from other Escape From Tarkov maps as it also features a lot of spawn areas. These are the locations where you can spawn on the map:
- 1 Spawn at Side Tunnel
- 4 Spawn Points at Southern Beach
- 1 Spawn Near Crashed Helicopter
- 1 Spawn Point at Southern Road
- 1 Spawn at Main Road
- 2 Spawn Places in the Village
There are around 12 PMC spawns scattered from the southern beaches up to the northern industrial zones. If you spawn in the south, you’ve got options: you can push north toward the high-value loot in the Chalets or head east to the Village. Either way, be aware of long-range campers who are always ready to pick off players trying to make a move up the map.
In the middle of the map, a cluster of spawns gives you quick access to hotspots like the Water Treatment Plant or the Chalets. Up north, spawns are near the Train Yard, with some great loot, though it’s usually both Scavs and players early on. No matter where you start, expect a lot of foot traffic and inevitable firefights as players converge on the loot-rich areas. This map might be big, but those high-value spots tend to funnel everyone together in a chaotic stew of bullets and paranoia.
All Extractions/Exits on Lighthouse
Lighthouse has many extraction points, but they’re specific about who can use them and under what conditions.
| Extraction Point | Faction | Always Available | Requirements | Notes |
|---|---|---|---|---|
| Southern Road | PMC | Yes | None | Located in the southeastern corner of the map. |
| Northern Checkpoint | PMC | Yes | None | Found on the northwestern side of the map near the main road. |
| Mountain Pass | PMC | No | Red Rebel Ice Pick + Paracord; No body armor | Extraction between the Chalets; only for PMCs with the right gear and no armor equipped. |
| Road to Military Base V-Ex | PMC | No | 5,000 Roubles per player | Vehicle extraction in the east; fee amount is affected by Scav karma. |
| Path to Shoreline | All | Yes | None | Accessible to all players, located in the Village area. |
| Side Tunnel | All (Co-op) | Yes | Scav + PMC (co-op extraction) | Requires a PMC and a Scav together; found near the helicopter crash site. |
| Armored Train | All | No | Train arrives mid-raid | Train arrives between 20-15 minutes remaining, stays 7 minutes, and honks twice before leaving. |
| Hideout Under Landing Stage | Scav | Yes | None | Located under the pier to the west of the Side Tunnel exit. |
| Industrial Zone Gates | Scav | Yes | None | Located near the Train Yard on the eastern side of the map. |
| Scav Hideout at the Grotto | Scav | Yes | None | Found along the coast, west of the Water Treatment Plant. |
| South Road Landslide | Scav | Yes | None | Found in the southeastern section, along the coastline. |
- Armored Train: This shared extraction point honks twice when it arrives and once before departure. The train’s stay time at the station is 7 minutes and it’s a popular extraction, so expect possible encounters with other players.
- Mountain Pass: It is a specialized PMC exit that requires both a Red Rebel Ice Pick and Paracord, with the extra condition of having no body armor equipped (though armored rigs are allowed).
- Road to Military Base V-Ex: This vehicle extraction is limited to PMCs and costs 5,000 Roubles per player, so make sure to carry cash. The fee can vary based on Scav karma.
- Side Tunnel: A co-op exit, requiring both a Scav and a PMC together to extract. It can work as a lifesaver in a pinch if you find a friend to coordinate with.
Use this table as your quick guide to plan your exit strategy in the Lighthouse map of Tarkov.
All Scavs on Lighthouse
Almost all strategic points have Scavs, but you will not find them until well into the attack. There are generally multiple Scavs throughout the main road, and you can count on them to help you with a task. The region around the water treatment plant is very hazardous because of the lethal Variasnte of the Scavs, often known as Rogues.
Lighthouse’s terrain is a breeding ground for Scavs and perhaps even raiders on occasion. The Rogues won’t instantly begin shooting toward you if you are a USEC. However, they will give you a warning or two before opening fire. If you engage them, you will be regarded as a threat by specific Raids and targeted as soon as you get close.
- Related: Escape from Tarkov Woods Map Guide
High-Stakes Loot Spots
Lighthouse has some of the best loot density in Escape From Tarkov, but it’s heavily guarded. Visit these locations if you’re looking to fill your bags:
- Water Treatment Plant – It is guarded by Rogues who’d love nothing more than to mow you down with their heavy guns. By clear out the Rogues, you can loot to your heart’s content. Expect high-tier gear, medical supplies, and rare items like GPUs.
- Chalets – These buildings in the center-south area are crammed with rare loot and quest items. Get your hands on keys to unlock rooms containing weapons and ammo cases.
- Village – A solid area with medium-value loot. It’s less risky than the Treatment Plant, but you can still find useful stuff like tech loot, intelligence folders, and jackets that sometimes hold valuable keys.
- Train Yard – Another decent loot area where you can find crafting materials, though you’ll run into a lot of Scavs here. Watch for other players circling for the same scraps, and keep an eye on the extraction times to use the train for escape.
- Lighthouse Island – The bridge to the island is guarded by an angry sniper and peppered with Claymores. You can cross safely using a Digital Secure DSP Radio Transmitter to disable the mines and avoid drawing sniper fire. Otherwise, consider it off-limits unless you’re itching for a quick trip back to the lobby.
Rogue Bosses
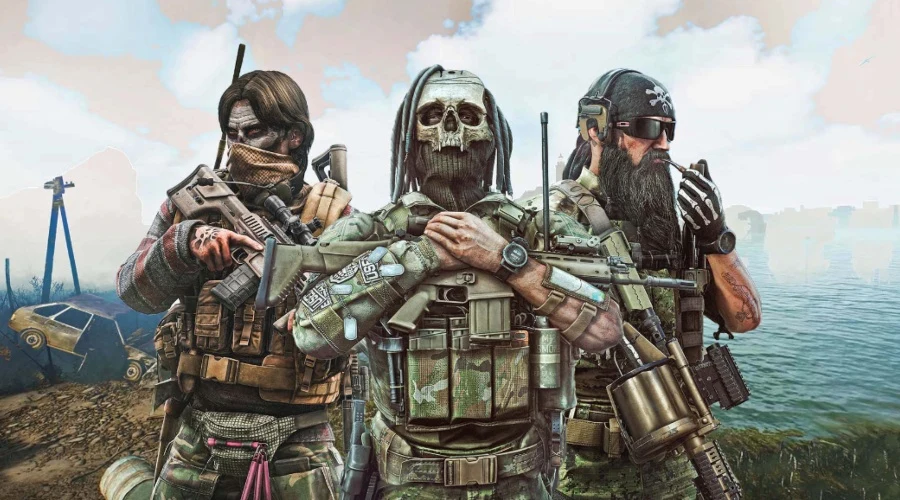
The Water Treatment Plant is a Rogue fortress, they’re former USEC operatives who will give USEC players a chance to survive. But if you’re a BEAR or have any link with it, they’ll be hostile and open fire on sight. Big Pipe, Birdeye, and Knight are the three Rogue bosses you need to fight on this map.
Rogues wield heavy machine guns and grenade launchers, so be cautious in encounters. It’s recommended to flank from the west and use grenades to suppress the Rogues on the rooftops. They’re sharp, they hit hard, and if you make the mistake of peeking twice from the same spot, you’ll probably end up in the afterlife wondering where it all went wrong. Until you are away from the plant area, the enemies will not attack so you don’t have to go to this arena if you don’t have a mood to fight.
Tip: If you kill Rogues as a USEC, they’ll remember you as an enemy for the next three Raids. So think carefully about whether a fight is worth it.
Tips to Survive on Lighthouse Map
- Bring a Scoped Weapon – The wide-open areas are an easy spot for snipers to shoot you from a long-hidden distance, so bring a scope or a designated marksman rifle if you can.
- Patience at the Water Treatment Plant – The Rogues have great gear, but patience is key. Take your time, clear them out methodically, and avoid rushing in, or they’ll turn you into Swiss cheese.
- Avoid High-Traffic Exits Late in the Raid – The Armored Train and popular PMC exits can turn into killing zones, so be cautious when heading out at such places.
- Know Your Faction – Keep in mind, Rogues are less hostile toward USEC players. If you’re USEC, approach carefully; if you’re BEAR, avoid them altogether unless you’re confident in your PvE skills.
Lighthouse is a map that rewards bravery but punishes recklessness. The loot is fantastic, but there are some of the toughest AI Scav enemies in Escape from Tarkov. If you’re prepared, you can walk out of here alive with a bag full of loot. If you’re not, be ready to get familiar with the respawn screen.

